I’m still stumbling my way around Pinterest. Although I “follow” a few of my friends, I find that I prefer just typing in a search term to see what ideas folks have.
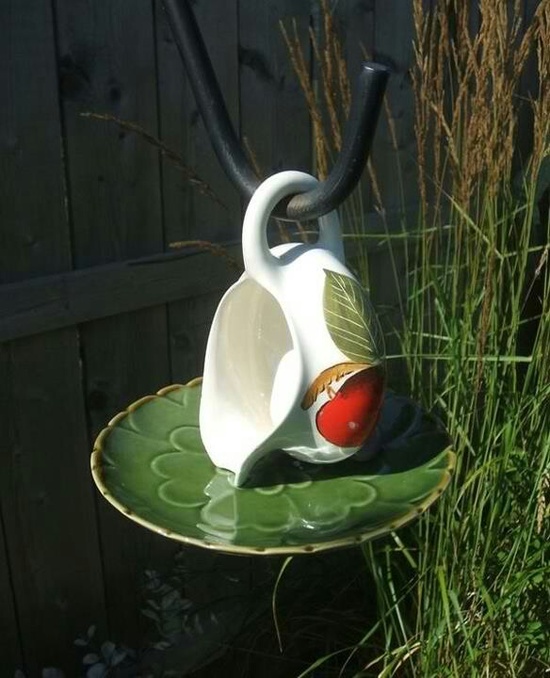
Recently I saw this cute little bird feeder, made from a creamer and saucer. I’m not sure about Pinterest etiquette: am I supposed to give credit to the person who pinned it? As I said, I’m still stumbling learning.
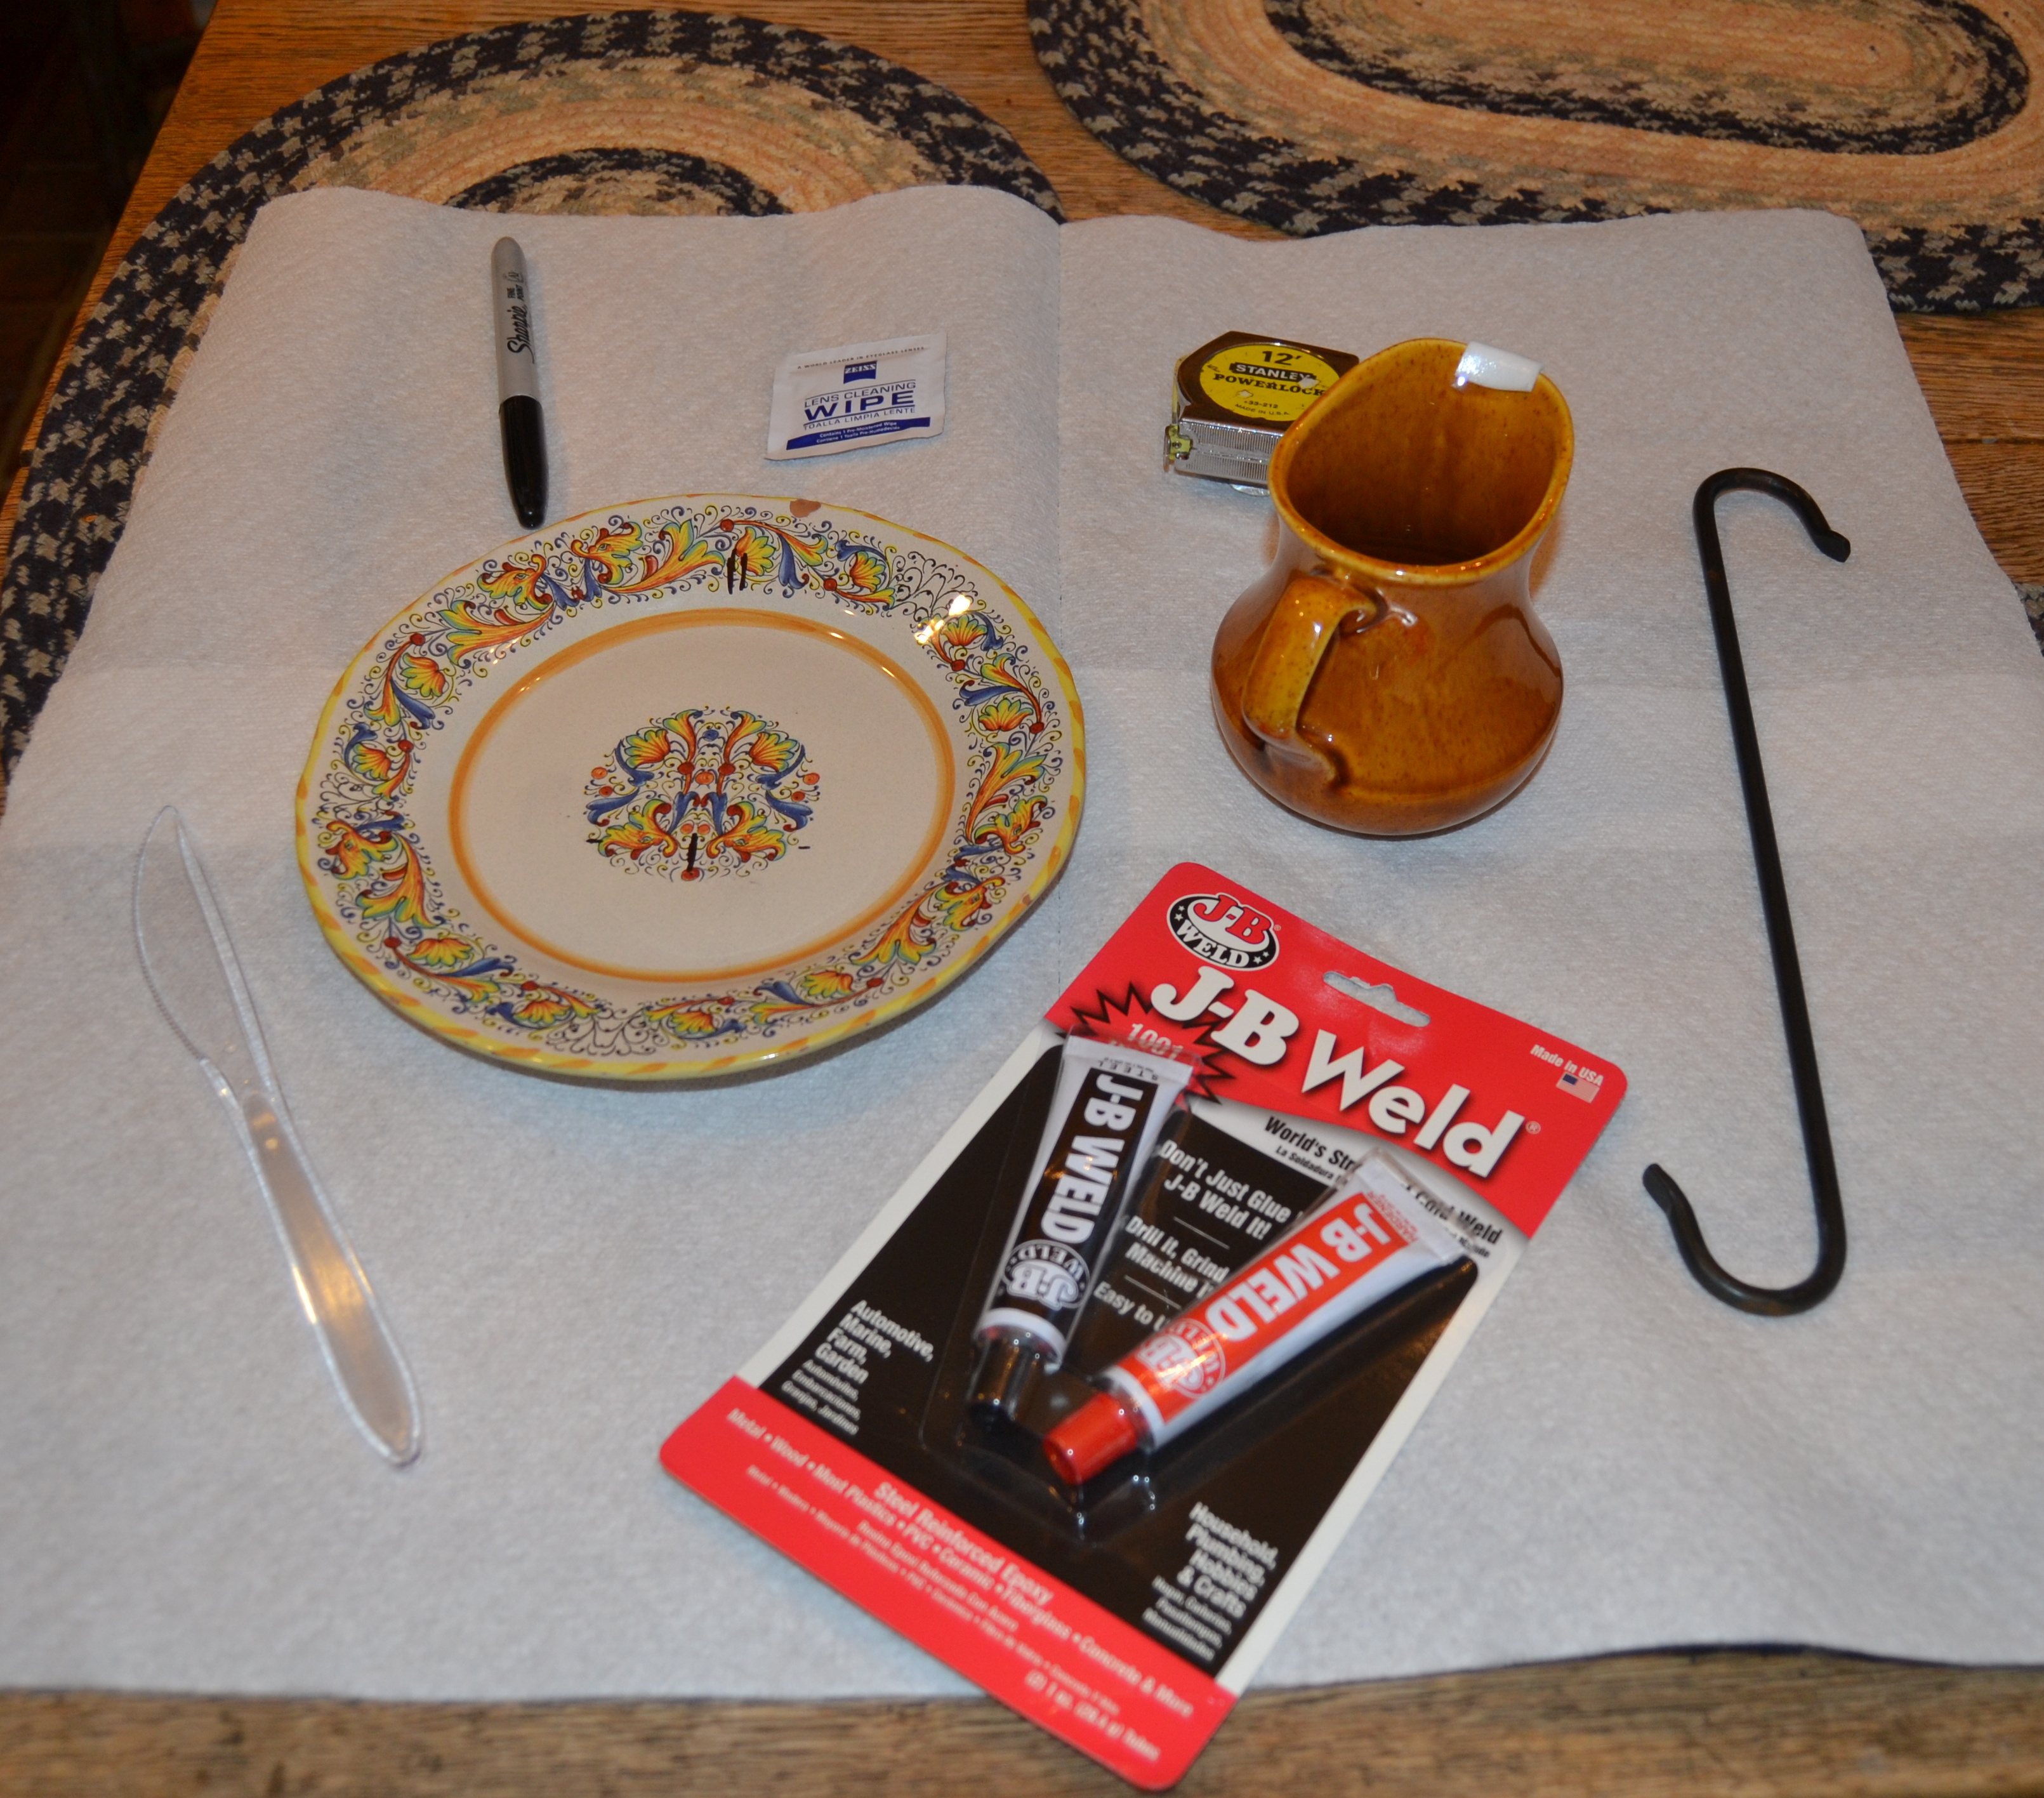
Since dishes like this can be bought for a song at thrift shops, I went shopping. Motor Man and I made a feeder, and learned a few things from the first one. He thought sharing how we made it might be an interesting blog post.
Here are our supplies: A creamer, saucer, tape measure, Sharpie, JB Weld (bought at our local NAPA auto parts store), an alcohol wipe to clean the surfaces before gluing and the hook for hanging. We forgot one thing in the photo, though: double sided tape, which you can see on the mouth of the creamer.
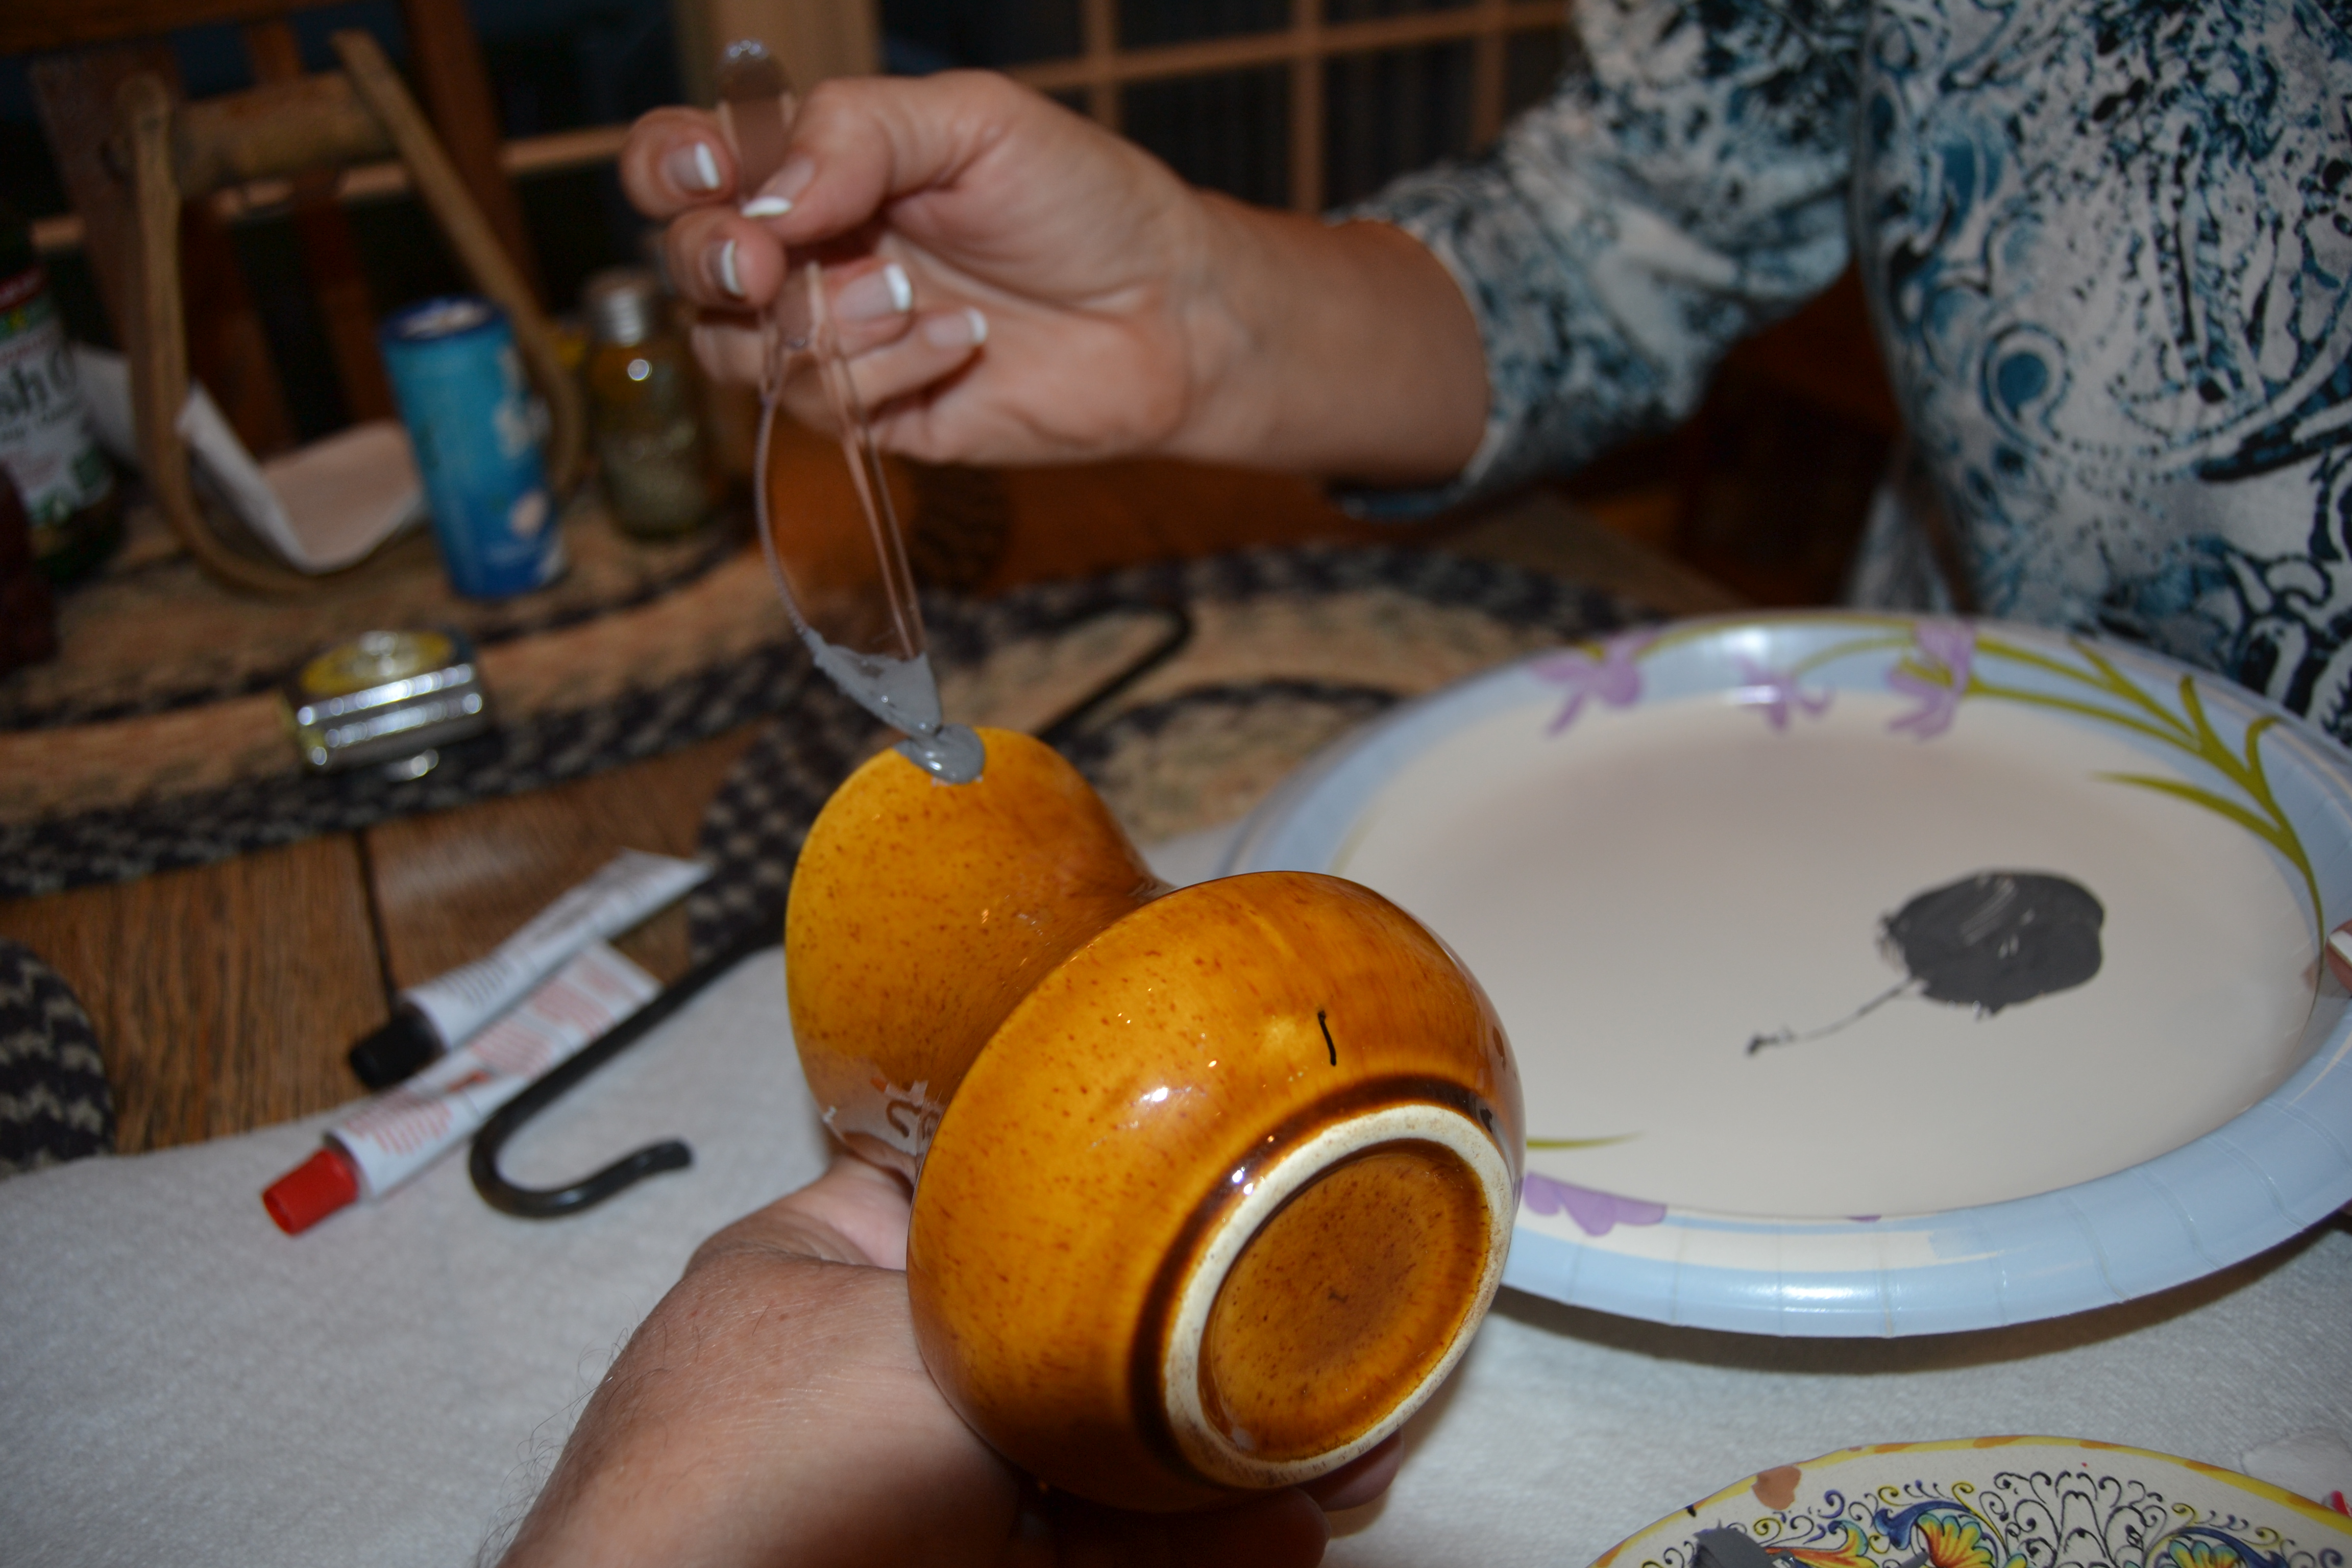
First we needed to find the center of gravity, so the feeder would hang level. We attached the tape to the creamer and placed it on the saucer. Then I held it up, using the hanger, and we moved the creamer until the feeder would hang correctly. Motor Man marked where the creamer should be placed on the saucer. (Now I remember that this step made the tape measure unnecessary. Lesson learned from bird feeder #1.)
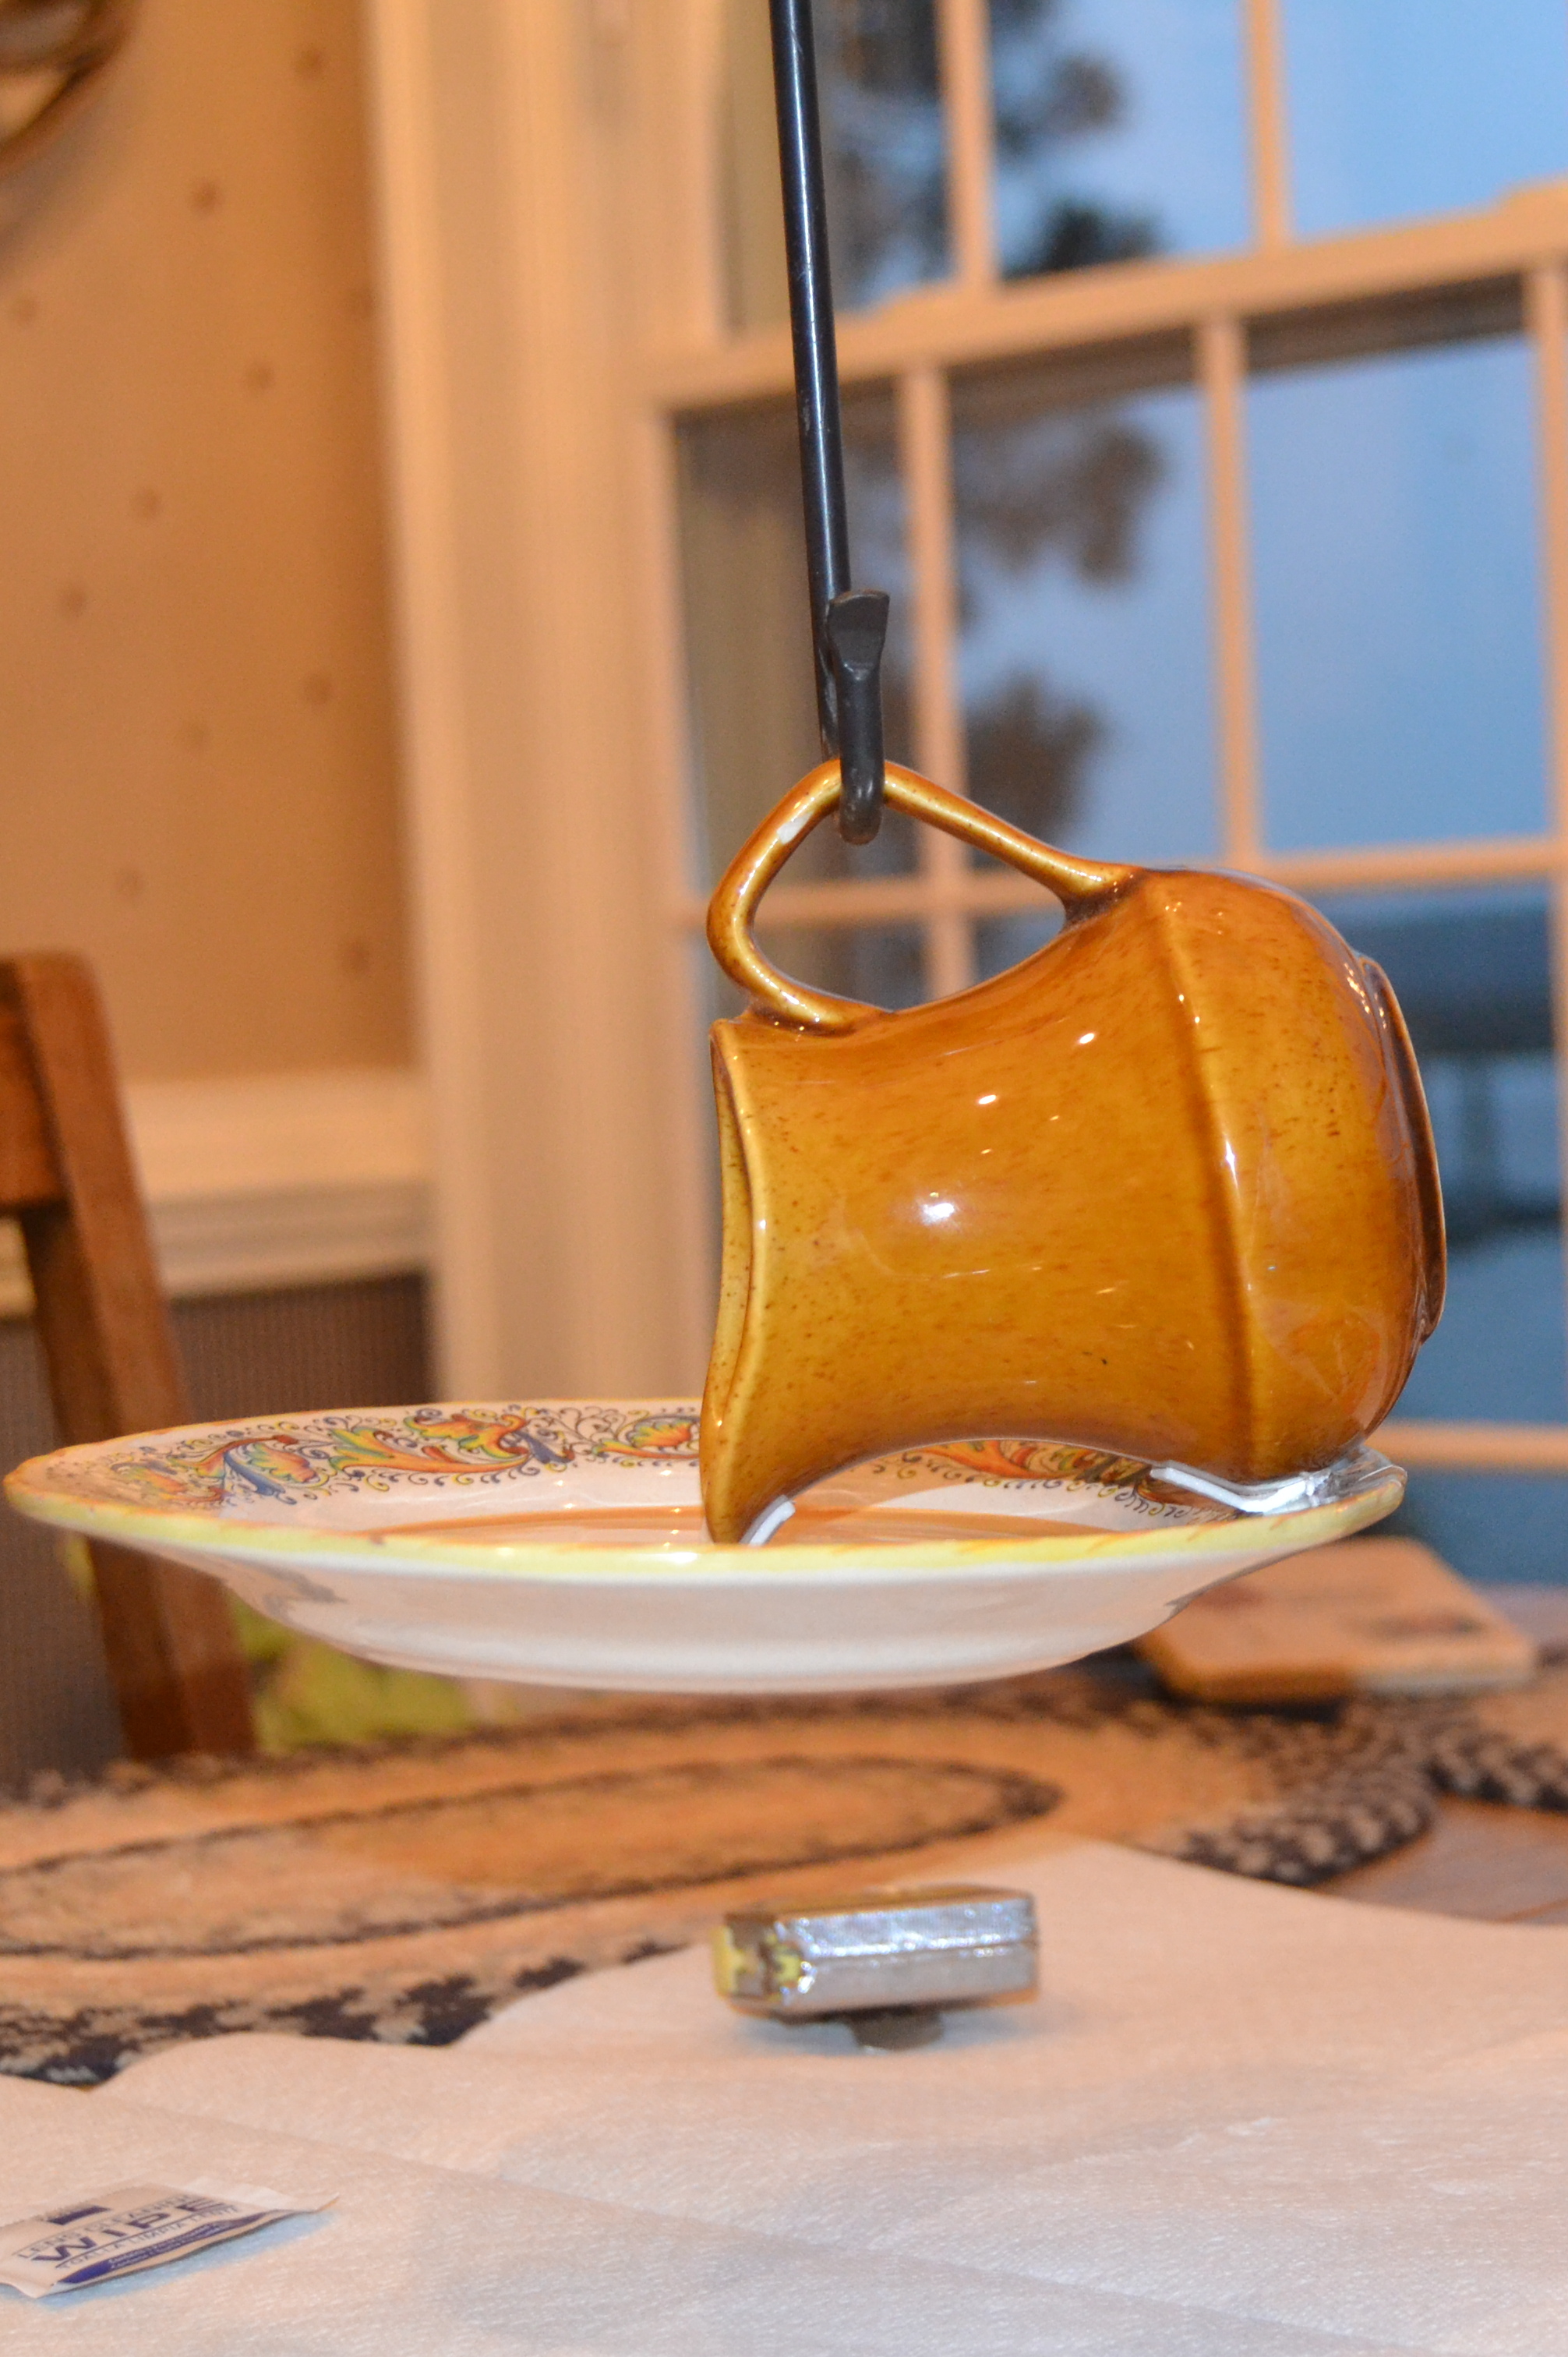
Then I mixed the JB Weld (there are two tubes, and you mix them in equal parts).
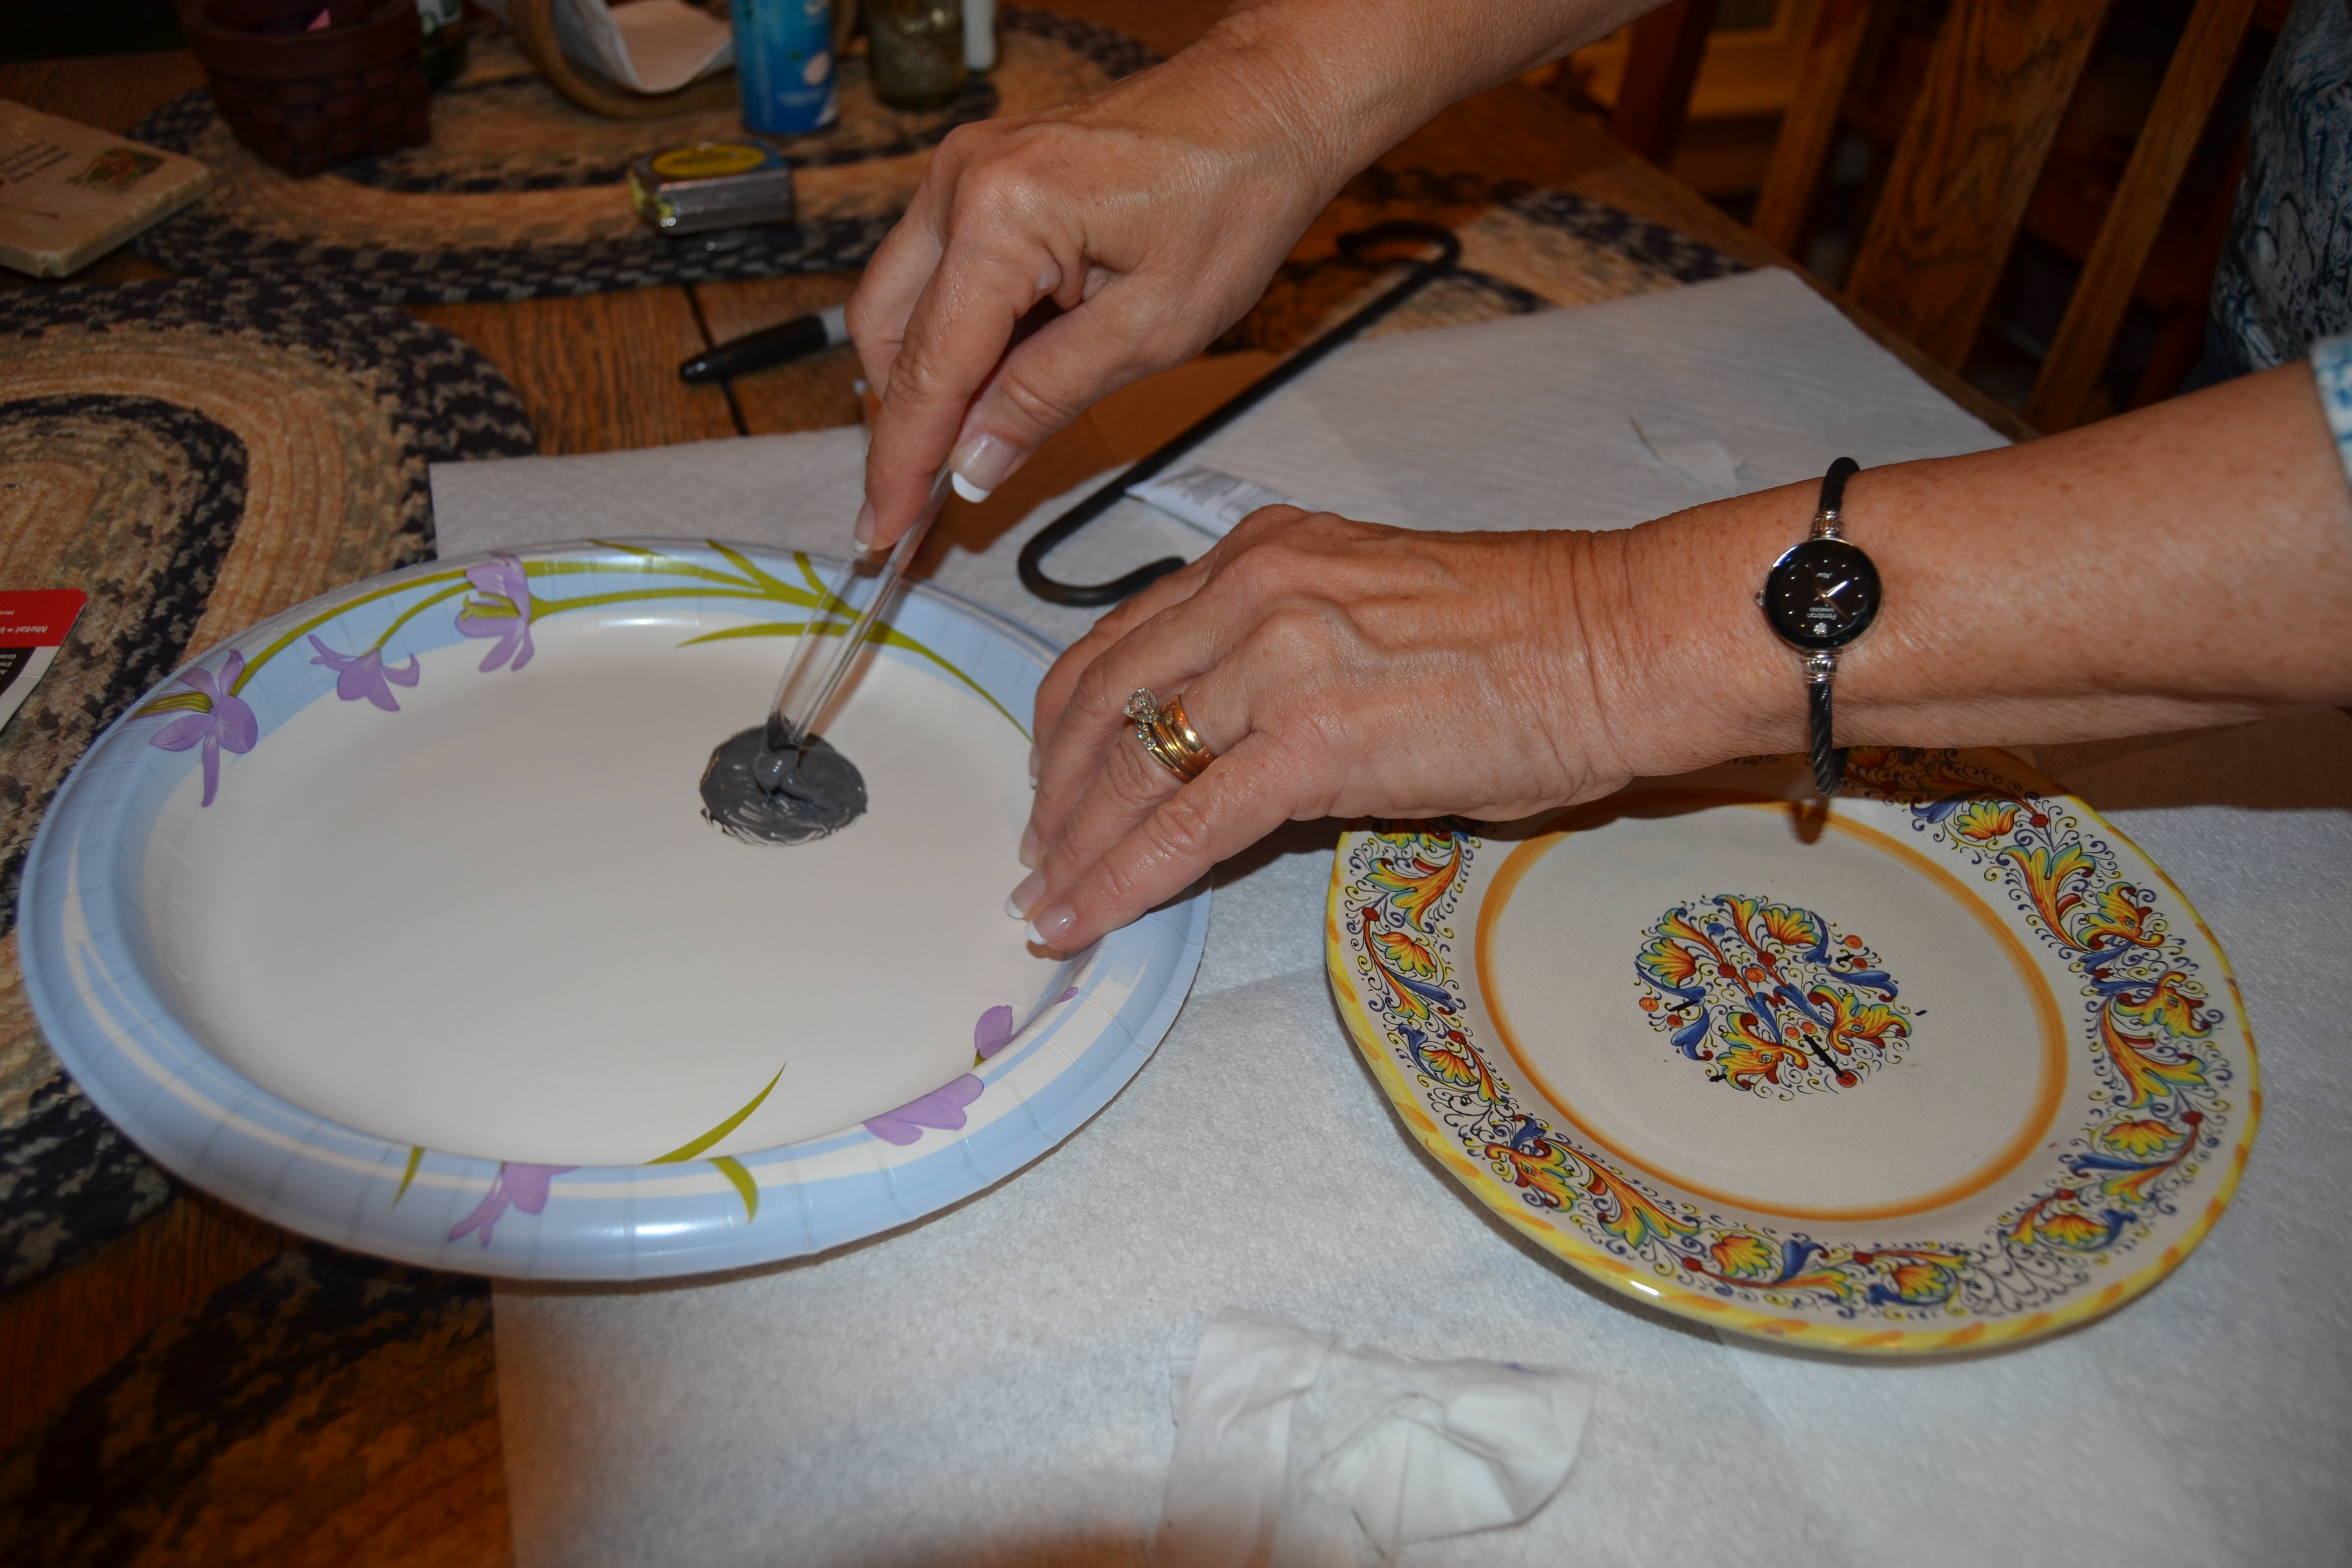
I put an ample amount of glue on both the pitcher and the saucer.
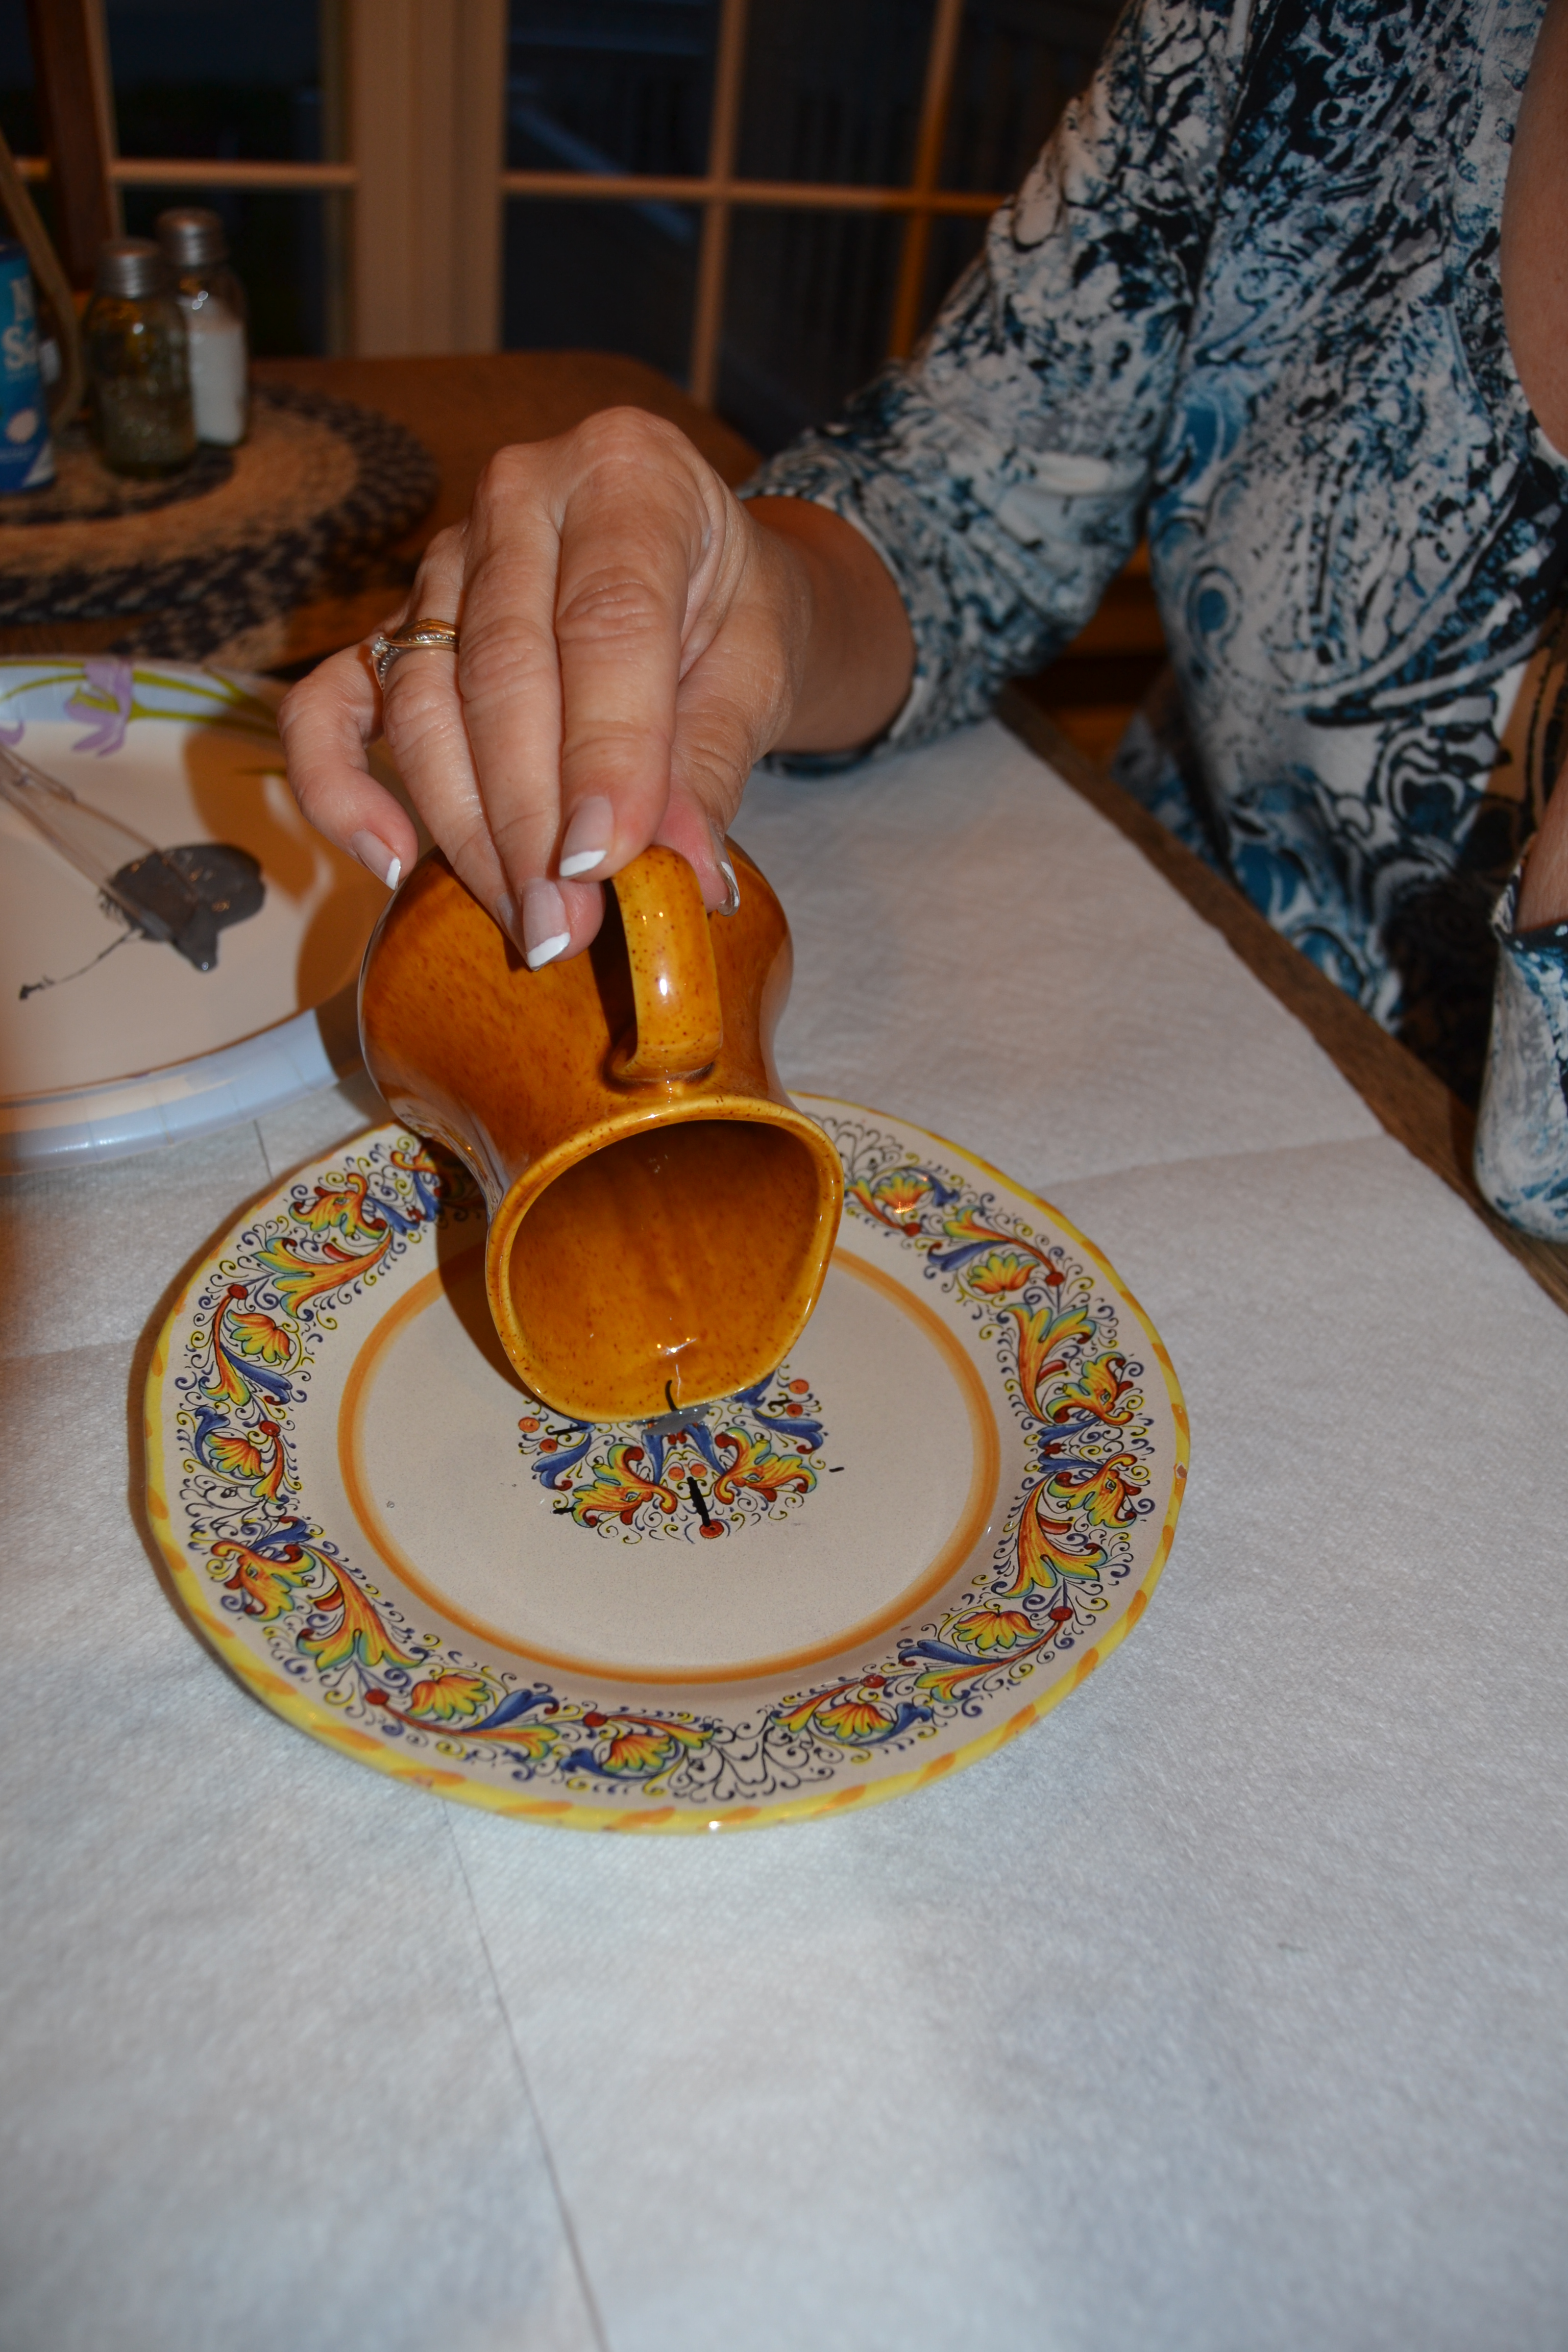
Then I placed the creamer on the saucer and let the glue set up for 24 hours. Thankfully I didn’t have to hold it the entire time.
And here’s our bird feeder.
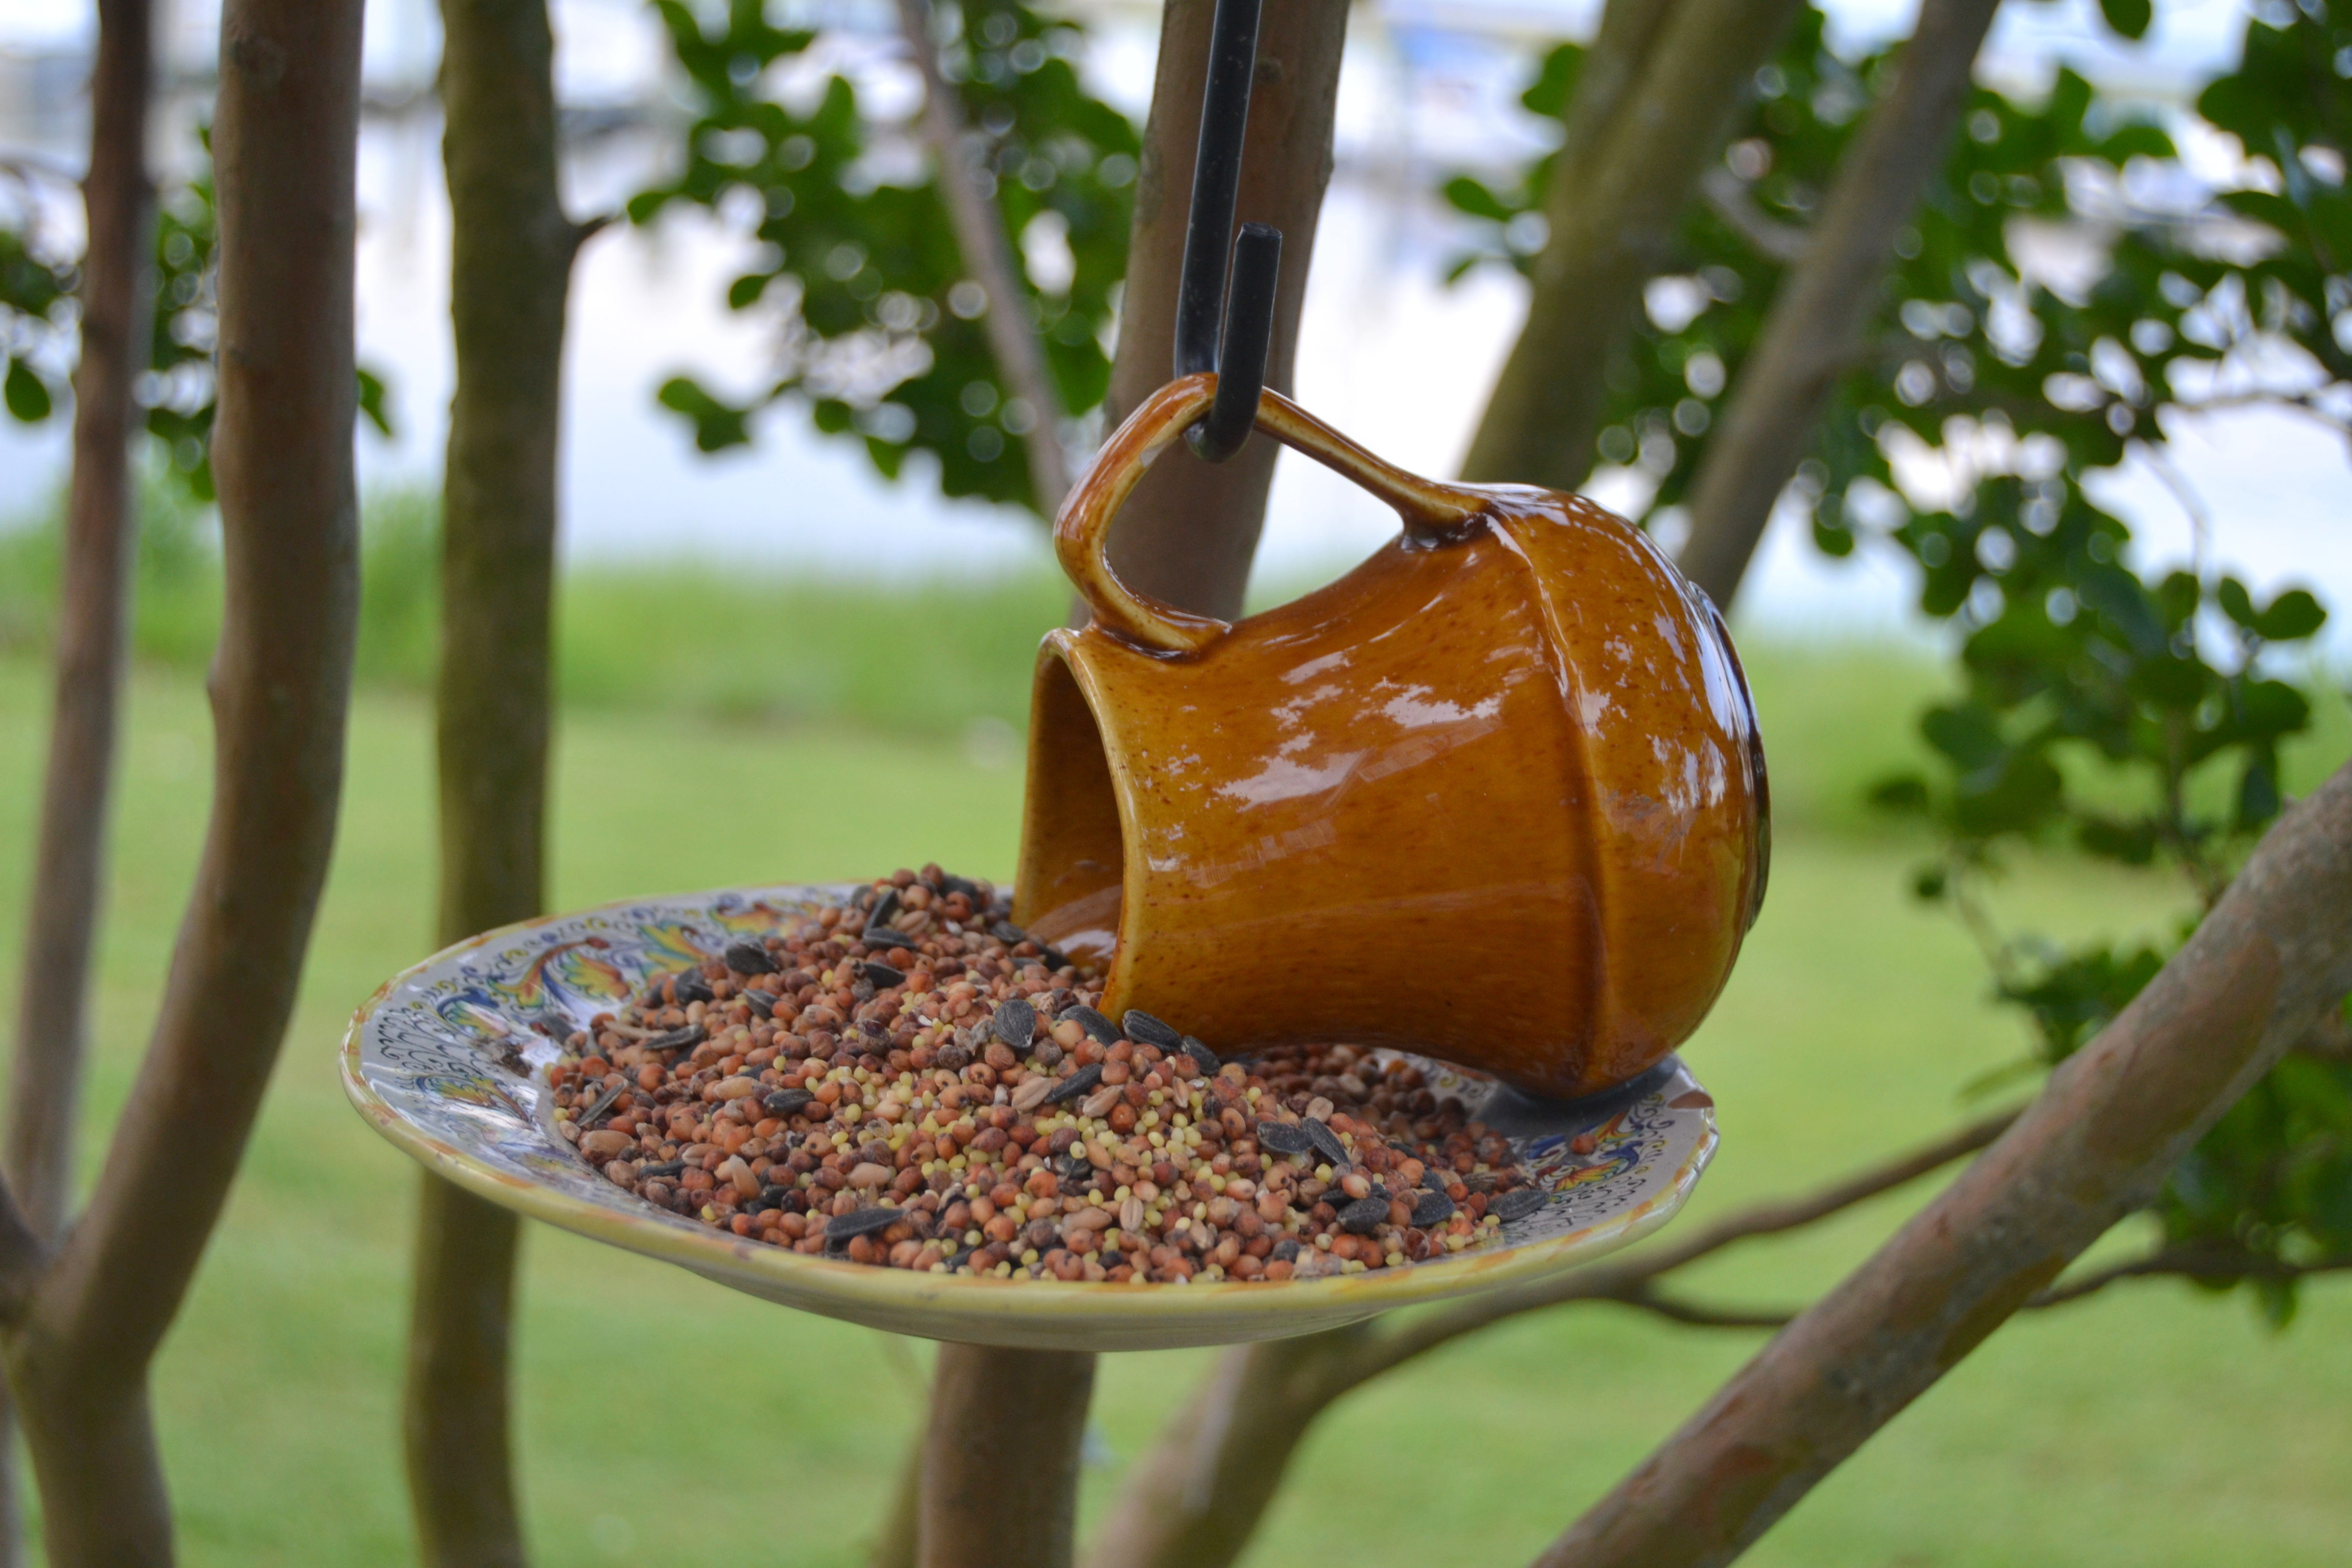
The birds wouldn’t cooperate for me to get a photo of them dining here. But, suffice it to say that this little feeder gets refilled often.